
Tips for Painting Your Kitchen Cabinets
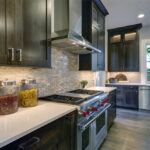
Want to get the great appearance of custom painted cabinets in your kitchen? You don’t have to start from scratch with brand-new cabinets—a fresh coat of paint can do a lot to give an updated look to cabinets that are otherwise old and outdated, and will cost you a whole lot less money.
Here’s a quick overview of how you can take on the job and wind up with great results.
Gather up your equipment
Before you get started, make sure you have all the tools you need for the job. You’ll want some fine-grit sandpaper and a sanding block, some tack cloth, steel wool, a paint applicator, painter’s tape, a primer and sealer, semigloss paint of your chosen color(s), some denatured alcohol and trisodium phosphate (TSP).
Visualize and prepare
You should have a plan for your custom painted cabinets before you start working. Wood, laminate and metal cabinets will be harder to paint than cabinets that are already painted. Flat-front drawers and doors are easier to repaint than woodwork with routed profiles, raised panels and other types of detailing. You might opt to replace doors that are damaged or warped rather than refinishing them with paint.
Decide if you will use sprayers, brushes or rollers for painting—the best choice depends on your own preferences and the amount of wood you need to paint.
Take off the doors and hardware
Clear off your counters, empty out the cabinets and remove all doors, hinges and other hardware. Make sure to label all doors with their proper location so you do not mix them up. Keep the hinges and hardware with the correct doors as well, unless you intend to replace them.
Clean
Before you get started, you should prepare the surfaces. A lot of grease and steam gets built up in kitchens, so you should clean off the surfaces before you even think about painting. A solution made with one part TSP and four parts water will be effective for removing residue. Rinse the cabinets but don’t soak, and allow them to dry.
Sand
If you’re using new hardware, put wood filler into the holes. Otherwise, you can get started with sanding right away on all sides and faces. A wood block will prevent rounding at the wood edges. You do not need to remove all the old paint—you just need to get it rough so it will give the new paint a good base with strong adhesion. Make sure to vacuum when finished to remove all sanding dust, and wipe off with a tack cloth.
Apply the primer sealer and paint
If the wood was not previously painted, you should apply a primer sealer to make sure the paint bonds on to the surface well. If the surface had previously been painted or after you apply the primer sealer, you can then move ahead with the paint. Use a semi-gloss paint, which is easier to clean off than flatter paints. Make sure to apply the paint evenly in light coats and cover all areas. Let dry at least four hours between coats.
Once you complete this process, you can put all the hardware back on and reinstall the doors.
For more information about custom paint jobs for your cabinets, contact us at Nowak Cabinets of Midland.


Categorised in: Cabinetry
This post was written by Writer