
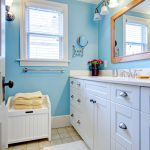
What Is the Proper Way to Install a Cabinet?
Interested in doing the cabinet installation portion of your kitchen remodel by yourself? If so, it’s important that you learn how to do this project correctly so you don’t end up with substandard results.
Here’s an overview of the proper steps for how to install a cabinet in Midland, MI:
- Measure and mark: Good, accurate measurements are crucial for completing a cabinet installation job properly and to high standards. You should measure the height of your base cabinets first, being sure to add the standard inch and a half for the countertop. Standard base cabinets will generally be 34.5” tall, plus the counters. If you’re adding an 18” backsplash, that means you’ll need a total measurement of 54” from the floor to the bottom of your upper cabinets. If you do not have a level floor, you should measure from the highest point on the wall instead. When you’ve made your measurements, use a level and draw a horizontal wall to guide your cabinet hanging.
- Locate studs: You’re going to need to put your cabinets into the studs for them to be sturdy and capable of holding all of your items. Use a stud finder and mark the locations of the studs, as well as any electrical wiring and plumbing.
- Add a ledger board: Secure your ledger board to the wall, screwing it into the studs. Check the cabinets and remove doors and hardware so they’re easier to install.
- Hang the cabinets: Attach multiple cabinets together if possible (and if you’re capable of lifting them), and then install them on the ledger board. Usually you’ll be able to install two cabinets together, if you have another person helping you. Use clamps to make sure the cabinets are plumb together and to ensure the fronts are flush. Pre-drill and secure the cabinets together, then lift the cabinets onto the ledger board and check for plumb and level, shimming as needed. Then secure the cabinets into the wall right at the studs, again checking for plumb and level as you secure them. Repeat this process for all cabinets on the wall.
- Filler bar: If there is a space between the final cabinet and the wall, you can add a filler bar to enclose the gap. Make sure to cut it to fit that space.
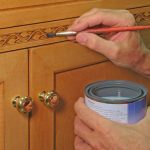
- Attach doors and hardware: When all the cabinets are installed, you can then attach the doors and hardware, and remove the ledger board.
You should always install your upper cabinets before installing your base cabinets—this will be better for your measurements, and also get the tougher task out of the way first. Base cabinets will follow the same general process, though you may need to add shims in spots if the floor is not level.
For more information about DIY cabinet installation in Midland, MI and the steps you’ll need to follow to complete the job properly, we encourage you to reach out to Nowak Cabinets of Midland with any questions. We look forward to assisting you!


Categorised in: Cabinetry
This post was written by Writer